LXE ® Reset - Boot

LXE ® Soft - Hard - Factory Reset
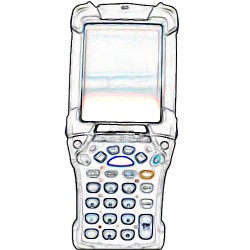
LXE MX6 Soft - Hard Reset (Warm - Cold Boot)

LXE MX6 Soft Reset - Warm Boot

1. Press and hold the CTRL + SFT buttons for approximately 10 seconds.
2. Release the keys and the MX6 resets. The red and green LEDs blink for approximately 3 seconds.


LXE MX6 Hard Reset - Cold Boot

1. Press and hold the CTRL + ESC buttons for approximately 3 seconds.
2. The red and green LEDs blink for approximately 3 seconds When the MX6 reboots,
   it will need to be configured once again.


LXE MX7 Tecton Soft - Hard - Factory Reset (Warm - Cold Boot)

LXE MX7 Tecton Soft Reset - Warm Boot

1. Hold down the Power key for 15 seconds until the display blanks, then release the key.


LXE MX7 Tecton Hard Reset - Cold Boot

1. Tap Windows icon | Run and type “COLDBOOT.EXE”. Tap the OK button to coldboot the MX7.
2. The default settings are restored when the device powers on again.
   For OS versions prior to August 2008, calibrating the touchscreen will need to be performed
   when the cold boot process is complete.

LXE MX7 Tecton Factory Reset

1. Hold down the Blue + Scan + Power keys at the same time.
   After the keypress, the display turns solid white.
   Be sure to press the Scan key, not the Enter key.
2. Release the keys and immediately press and hold the Enter + Scan keys.
   After the keypress, the display turns dark.
   (If these keys are not pressed immediately the MX7 Tecton performs a Cold Boot.
   Wait until the MX7 Tecton boots and try again.)
3. Release the Reset keys. A message is displayed at the bottom of the display stating
   the change is in process. If the message does not appear, please try again.
   When all programs have finished loading, the Windows Mobile Start screen is displayed.
   If prompted, tap the touchscreen to set up your Windows Mobile based device.


LXE MX8 Soft - Hard - Factory Reset (Warm - Cold Boot)

LXE MX8 Soft Reset - Warm Boot

Method 1:
1. Hold down the Power key and then the Enter key until the screen blanks.
   Release the keys and the MX8 warm boots.

Method 2:
2. Tap Start | Run and, using the virtual keyboard or SIP, type “WARMBOOT”.
   Tap the OK button and the MX8 warm boots. This command is not Case-sensitive.


LXE MX8 Hard Reset - Cold Boot

Method 1:
1. Hold down the Blue key, the Scan key and the Power key until the screen blanks.
   Release the keys and the MX8 cold boots.

Method 2:
1. Tap Start | Run and, using the virtual keyboard or SIP, type “COLDBOOT”.
   Tap the OK button and the MX8 cold boots. This command is not case-sensitive.

LXE MX8 Factory Reset

1. Tap Start | Run and, using the virtual keyboard or SIP, type “RESETALL”.
2. Tap the OK button.
3. Because of the extreme nature of resetting the MX8 to factory default settings,
   two confirmation prompts are displayed. To proceed with the reset, select 'Yes' to both prompts.
   The MX8 cold boots after resetting the configuration. This command is not case-sensitive.


LXE MX9 Soft Reset (Warm Boot)

LXE MX9 Soft Reset - Warm Boot

Method 1:
1. Tap Start > Warmboot.

Method 2:
1. Tap Start > Settings > Control Panel > Registry > Warmboot.

Method 3:
1. Tap Start | Run, type “WARMBOOT” and press Enter button.


LXE HX2 / MX3 / MX3X Soft - Hard Reset (Warm - Cold Boot)

LXE HX2 / MX3 / MX3X Soft Reset - Warm Boot

1. Tap Windows icon | Run and type “warmboot”.
2. Tap the OK button.


LXE HX2 / MX3 / MX3X Hard Reset - Cold Boot

1. Tap Windows icon | Run and type “coldboot”.
2. Tap the OK button. Factory default settings overwrite all previously saved user settings.
3. Calibrating the touchscreen will need to be performed when the hard reset process is complete.


LXE VX3X Soft - Hard Reset (Warm - Cold Boot)

LXE VX3X Soft Reset - Warm Boot

1. Tap Start | Run and type “WARMBOOT.EXE” or “WARMBOOT”. This command is not case-sensitive.
2. Tap the OK button. This process takes less than 15 seconds. Temporary data not saved is lost.


LXE VX3X Hard Reset - Cold Boot

1. Tap Start | Run and type “COLDBOOT.EXE” or “COLDBOOT”. This command is not case-sensitive.
2. Tap the OK button.


LXE VX4 Soft Reset (Warm Boot)

LXE VX4 Soft Reset - Warm Boot

Method 1:
1. Press CTRL + ALT + DEL buttons.

Method 2:
1. Press CTRL + ALT + numeric buttons.


LXE VX5 Soft Reset (Warm Boot)

LXE VX5 Soft Reset - Warm Boot

1. Press CTRL + ALT + DEL buttons.
2. Select Shut Down from the Task Manager window.


LXE VX6 / VX7 Soft - Hard Reset (Warm - Cold Boot)

LXE VX6 / VX7 Soft Reset - Warm Boot

1. Tap Start | Run and type “WARMBOOT.EXE” or “WARMBOOT”. This command is not case-sensitive.
2. Tap the OK button. This process takes less than 15 seconds. Temporary data not saved is lost.


LXE VX6 / VX7 Hard Reset - Cold Boot

1. Tap Start | Run and type “COLDBOOT.EXE” or “COLDBOOT”. This command is not case-sensitive.
2. Tap the OK button. This command is located in the \Windows folder.


LXE VX8 / LXE Thor VX9 Soft Reset (Warm Boot)

LXE VX8 / LXE Thor VX9 Soft Reset - Warm Boot

1. Press CTRL + ALT + DEL buttons.
2. Select Shut Down from the Task Manager window.


LXE Thor VM1 Soft Reset (Warm Boot)

LXE Thor VM1 Soft Reset - Warm Boot

Method 1:
1. Using the Registry, select Start > Settings > Control Panel > Registry and
   tap the Warmboot button. The Thor VM1 immediately soft-resets.

Method 2:
1. Using the Start menu, select Start > Run and type “WARMBOOT” in the text box. Press Enter.
   The Thor VM1 immediately warmboots. The “WARMBOOT” text command is not case-sensitive.

Method 3:
 -  For the 64-key kepad, use the Ctrl + Alt + Del keypress sequence to reboot the Thor VM1.
    The keys may be pressed in sequence; they do not need to be held down simultaneously.
 -  For the 12-key kepad, use the 2ND + F5 + Shift keypress sequence to reboot the Thor VM1.
    The keys may be pressed in sequence; they do not need to be held down simultaneously.
    This reboot sequence also works on the 64-key keypad.


LXE 8600 / 8620 / 8650 Ring Scanner Factory Reset

8600 / 8620 / 8650 Ring Scanner Factory Reset

1. Scanning the following bar code to return all parameters to their default values:


    Scanning the following bar code to cancel: